
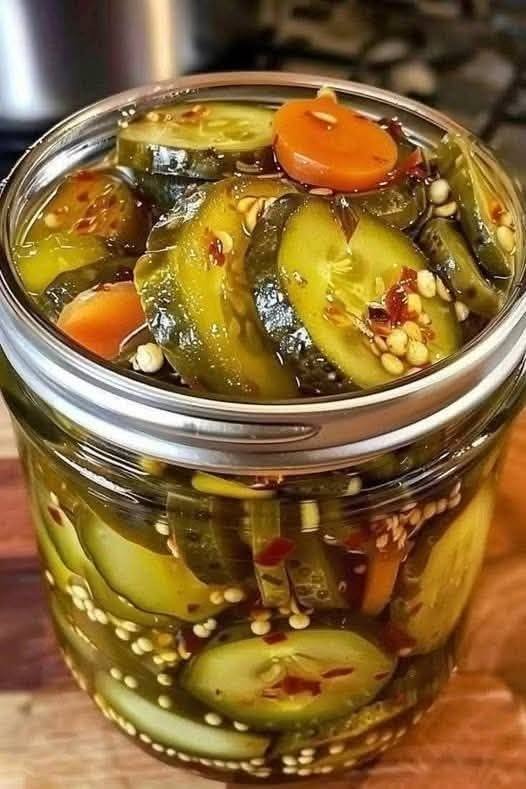
Description: Nothing beats the satisfying, loud crunch of a homemade pickle packed with bold garlic, fresh dill, and a lingering kick of cayenne and jalapeño heat. This easy canned recipe transforms crisp Kirby cucumbers into a tangy, vibrant condiment that instantly wakes up any savory dish. Because these pickles contain zero added sugar, they naturally fit into low-carb lifestyles and serve as the ultimate flavor-boosting sidekick for high-protein meals without adding heavy calories.
Can This Canned Homemade Spicy Dill Pickles Support Weight Loss Goals?
Yes, these pickles can be a great addition to a weight-loss-focused eating plan because they deliver massive flavor and crunch for virtually zero calories. When following a high-protein diet, meals like plain grilled chicken or lean turkey can sometimes feel repetitive; adding spicy, tangy pickles provides sensory variety and satisfaction without adding extra fats or sugars, making it easier to stick to your nutrition goals.
Does Canned Homemade Spicy Dill Pickles Fit a High Protein Lifestyle?
While cucumbers themselves are not a significant source of protein, these pickles are an ideal companion for a high-protein lifestyle. Made with simple, whole ingredients like fresh cucumbers, vinegar, garlic, and spices, they contain less than 1 gram of net carbs per serving. They pair effortlessly with protein-heavy staples like bunless burgers, tuna salad, cottage cheese bowls, and charcuterie boards, adding moisture and zest without disrupting your macronutrient targets.
My Personal Experience
-
Blossom End Trimming: I always slice a thin coin off the blossom end of every cucumber before packing the jars. This tiny step removes natural enzymes that can cause softening, ensuring every spear stays snappy months later.
-
Fresh vs. Dried Dill: Using fresh flowering dill heads rather than dried weed makes a noticeable difference in aroma. The fresh sprigs release essential oils into the hot brine that give the pickles an authentic deli-style depth.
-
Adjusting the Heat Level: Leaving the seeds inside the sliced jalapeños gives the brine a steady, warming spice. When I make batches for friends who prefer milder heat, I simply scrape out the seeds while keeping the pepper rings for flavor.
Perfect For:
-
High-Protein Snacks: Wrapping a spicy pickle spear in sliced turkey breast or ham for a quick, crunchy afternoon bite.
-
Low-Carb & Keto Diet Plans: Adding zesty flavor to bunless burgers, lettuce wraps, and grilled meats without added sugars.
-
Meal Prep Lunches: Packing alongside hard-boiled eggs, rotisserie chicken, or tuna salad to keep meal prep bowls exciting.
-
Summer Cookouts & BBQs: Serving as a crisp, refreshing counterpoint to rich, smoky grilled proteins.
Why You’ll Love This Recipe:
-
Unbeatable Crunch: Adding a pinch of food-grade calcium chloride (Pickle Crisp) ensures your home-canned pickles stay firm rather than turning mushy.
-
Customizable Spice: You control the heat by adjusting the red pepper flakes and fresh jalapeño slices in each individual jar.
-
Shelf-Stable Convenience: Water-bath canning locks in freshness so you can keep jars stocked in your pantry for months without taking up fridge space.
-
Zero Added Sugar: Unlike many store-bought varieties, this brine relies on tangy vinegar and aromatic spices, keeping it strictly low-carb.
Common Mistakes to Avoid:
-
Using Table Salt: Standard iodized table salt contains anti-caking agents that will turn your pickling brine cloudy and darken the cucumbers. Always use pure pickling or kosher salt.
-
Using Waxed Cucumbers: Slicing cucumbers from the grocery store often have a wax coating that prevents the brine from penetrating. Stick to unwaxed pickling (Kirby) cucumbers.
-
Skipping Headspace Measurement: Overfilling jars can force brine out during processing, preventing the lids from sealing properly. Leave a strict 1/2-inch headspace.
-
Processing Over Rolling Boil Timing: Starting your timer before the water returns to a full boil can lead to under-processed jars that are unsafe for shelf storage.
Required Equipment:
-
Water-Bath Canner (or Deep Stockpot with Rack) — Safely processes the jars at a rolling boil to create an airtight, shelf-stable seal.
-
4 Pint-Sized Mason Jars with New Lids — Provides the ideal portion size and ensures a reliable vacuum seal for long-term storage.
-
Canning Jar Lifter — Allows you to safely grip and transfer scorching hot jars in and out of boiling water without burning your hands.
-
Wide-Mouth Canning Funnel — Prevents messy brine spills on the jar rims, which is crucial for achieving a clean seal.
-
Bubble Remover or Wooden Chopstick — Releases trapped air pockets inside the packed jars so the brine surrounds every cucumber spear.
Storage Instructions:
Store properly sealed, unopened jars in a cool, dark pantry or cupboard for up to 12 months. Once a jar is opened—or if a jar fails to seal during processing—store it tightly covered in the refrigerator, where the pickles will stay crisp and flavorful for up to 2 months. Do not freeze canned pickles, as freezing ruptures the cell walls of the cucumbers and turns them completely mushy upon thawing.
Recipe Details
-
Preparation Time: 25 minutes
-
Cooking Time: 15 minutes
-
Total Time: 40 minutes
-
Servings: 16 servings (approx. 2 spears per serving)
-
Best Season for This Recipe: Summer (when fresh pickling cucumbers and dill are at peak harvest)
-
Total Calories (Per Serving): 10 kcal (approximate estimate)
These crisp, zesty spicy dill pickles combine fresh cucumbers, garlic, jalapeños, and aromatic dill in a tangy zero-sugar brine. They deliver bold heat and a satisfying crunch, making them the ultimate low-carb companion for high-protein meals and snacks.
📝 Ingredients:
-
2.5 lbs Kirby (pickling) cucumbers, washed and cut into spears (trim 1/16 inch off the blossom end)
-
3 cups white distilled vinegar (5% acidity — do not dilute further than directed for safe canning)
-
3 cups filtered water
-
3 tablespoons pickling salt (or pure kosher salt without additives)
-
4 cloves fresh garlic, peeled and lightly smashed
-
2 fresh jalapeño peppers, sliced into rings (leave seeds in for extra heat)
-
4 sprigs fresh dill (or 4 flowering dill heads)
-
1 teaspoon whole black peppercorns
-
1 teaspoon yellow mustard seeds
-
1 teaspoon crushed red pepper flakes (divided evenly among jars)
-
1/2 teaspoon Pickle Crisp granules (calcium chloride, optional, 1/8 tsp per pint jar for extra crunch)
Directions:
-
Prepare Jars and Canner: Wash 4 pint-sized mason jars, lids, and bands in hot, soapy water. Place the jars on the rack inside your water-bath canner, fill with water until jars are submerged, and bring to a gentle simmer over medium heat while you prep the brine and vegetables.
-
Make the Brine: In a medium stainless steel saucepan, combine the white vinegar, filtered water, and pickling salt. Bring to a boil over medium-high heat, stirring occasionally until the salt completely dissolves (about 3 to 4 minutes), then reduce heat to low to keep hot.
-
Pack the Spices: Carefully lift the hot jars out of the canner and place them on a towel-lined counter. Divide the smashed garlic, fresh dill, jalapeño rings, black peppercorns, mustard seeds, red pepper flakes, and Pickle Crisp evenly into the bottom of the 4 jars.
-
Pack the Cucumbers: Tightly pack the cucumber spears vertically into each jar, leaving at least 1/2 inch of space below the rim so the tops won’t touch the lid. (High-Protein Prep Tip: Pack spears extra snug so you always have ready-to-eat crunchy sides on hand to pair with lean meats or cheese).
-
Add Brine and Debubble: Using a funnel, ladle the hot brine over the cucumbers, maintaining a strict 1/2-inch headspace. Slide a non-metallic spatula or chopstick around the inside edges of the jar to release trapped air bubbles, adding a splash more brine if the level drops.
-
Seal and Process: Wipe the jar rims clean with a damp paper towel, center the lids on top, and screw the bands on until fingertip-tight. Lower the jars back into the canner (ensuring at least 1 to 2 inches of water covers the lids), bring to a full rolling boil over high heat, and process for 10 minutes.
-
Cool and Check Seals: Turn off the heat, remove the canner lid, and let the jars rest in the water for 5 minutes to prevent siphoning. Transfer jars to a towel-lined counter to cool undisturbed for 12 to 24 hours; the centers of the lids should pull down and not flex when pressed.
Nutrition Facts (Per Serving – Approximate):
-
Calories: 10 kcal
-
Fats: 0.1 g
-
Cholesterol: 0 mg
-
Sodium: 380 mg
-
Potassium: 95 mg
-
Total Carbohydrates: 2.1 g
-
Fiber: 0.5 g
-
Net Carbs: 1.6 g
-
Sugars: 1.1 g
-
Protein: 0.4 g
-
Calcium: 18 mg
Notes:
-
Flavor Maturation: Let the sealed jars sit in the pantry for at least 2 weeks before opening so the garlic, dill, and chili flavors fully infuse into the cucumbers.
-
No Reheating Required: These pickles are meant to be enjoyed chilled or at room temperature straight from the jar.
-
Allergy Note: This recipe is naturally gluten-free, dairy-free, nut-free, and vegan; however, it contains mustard seeds, which is a priority allergen in some regions.
-
Extra Flavor Boost: Add 1/4 teaspoon of coriander seeds and a bay leaf to each jar for a sharper, deli-style aromatic profile.